My second piercing was a mistake. I pointed at the wrong spot and just said “there.” Don’t do that.
Knowing the types of ear piercings before you go makes the whole process easier and way less stressful.
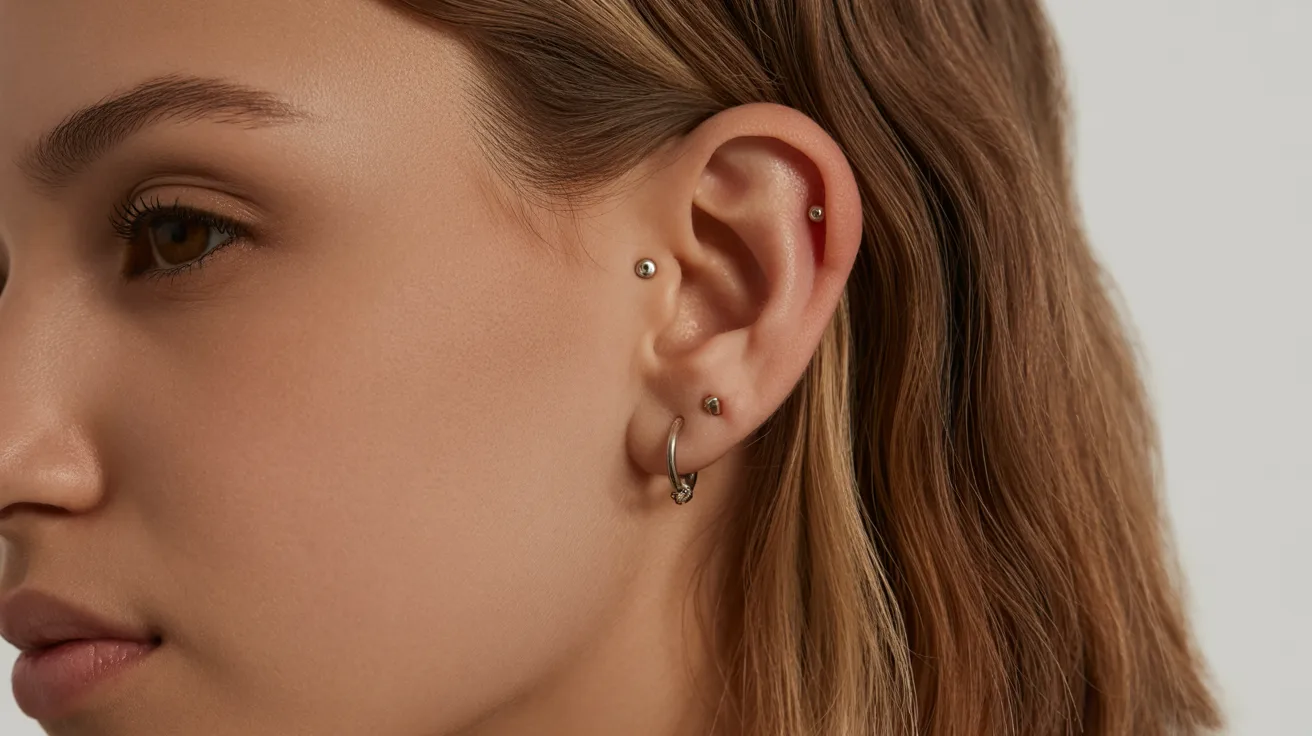
I’ve covered fashion and style for years and put together all 23 types in one place.You’ll get the name, exact placement, and visual cue for each one.
I’ll also cover aftercare tips so your piercing heals right the first time.
Clear. Simple. Useful. That’s all this is.
Everything You Need to Know Before Getting an Ear Piercing

Before you pick a placement, it helps to know your options. Most people only know two or three ear piercing types by name.
But there are 23, and each one sits in a completely different spot.Some go through soft tissue and heal in weeks.
Others go through cartilage and take up to a year. The placement changes everything, from pain level to jewelry style.
Getting familiar with all 23 types first saves you from making a rushed call in the studio.
List of 23 Ear Piercings: Names, Placements & Visual Cues
All 23 ear piercing types, laid out clearly with placement details and visual cues to help you choose with confidence.
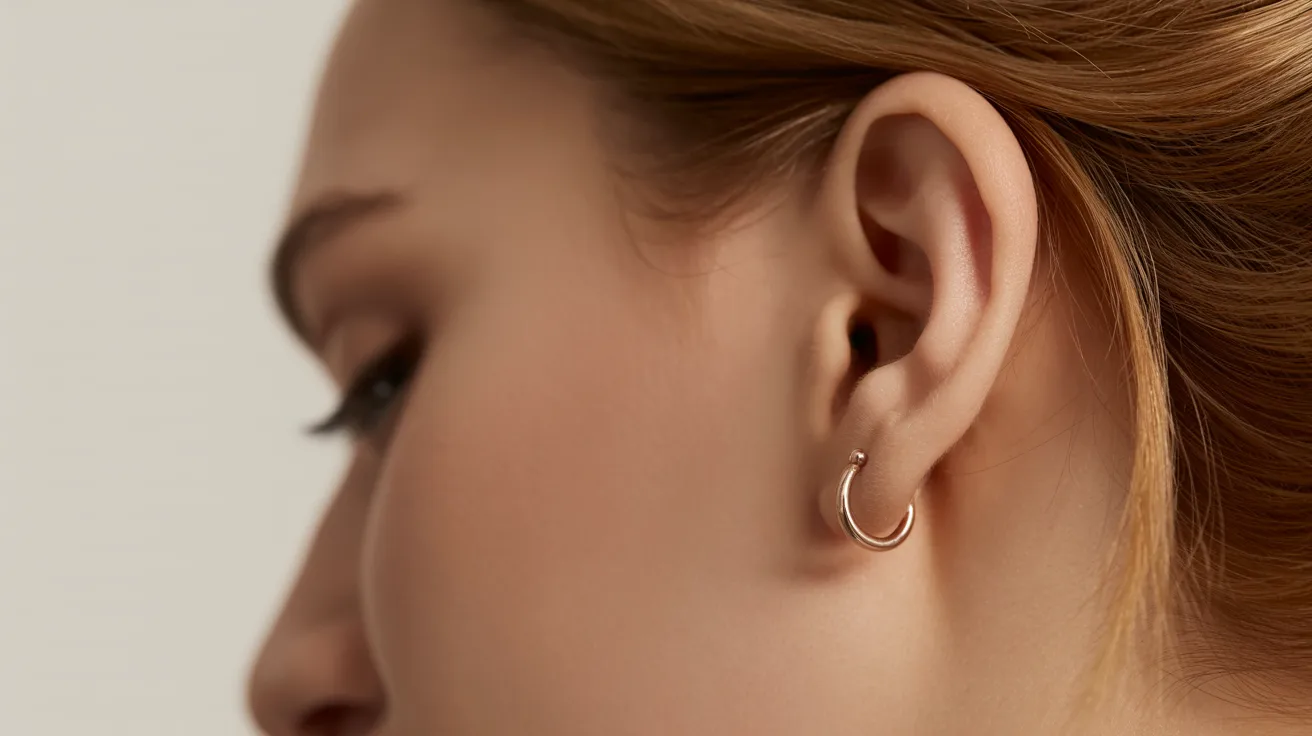
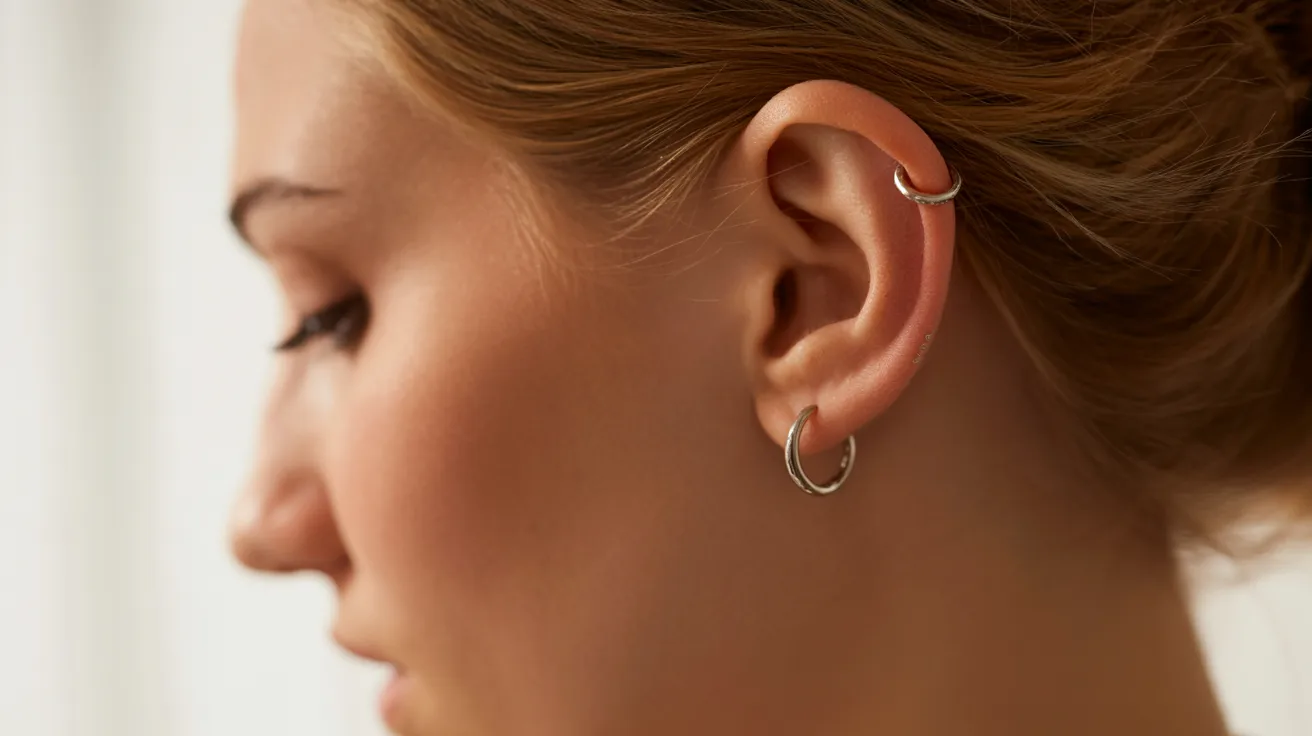
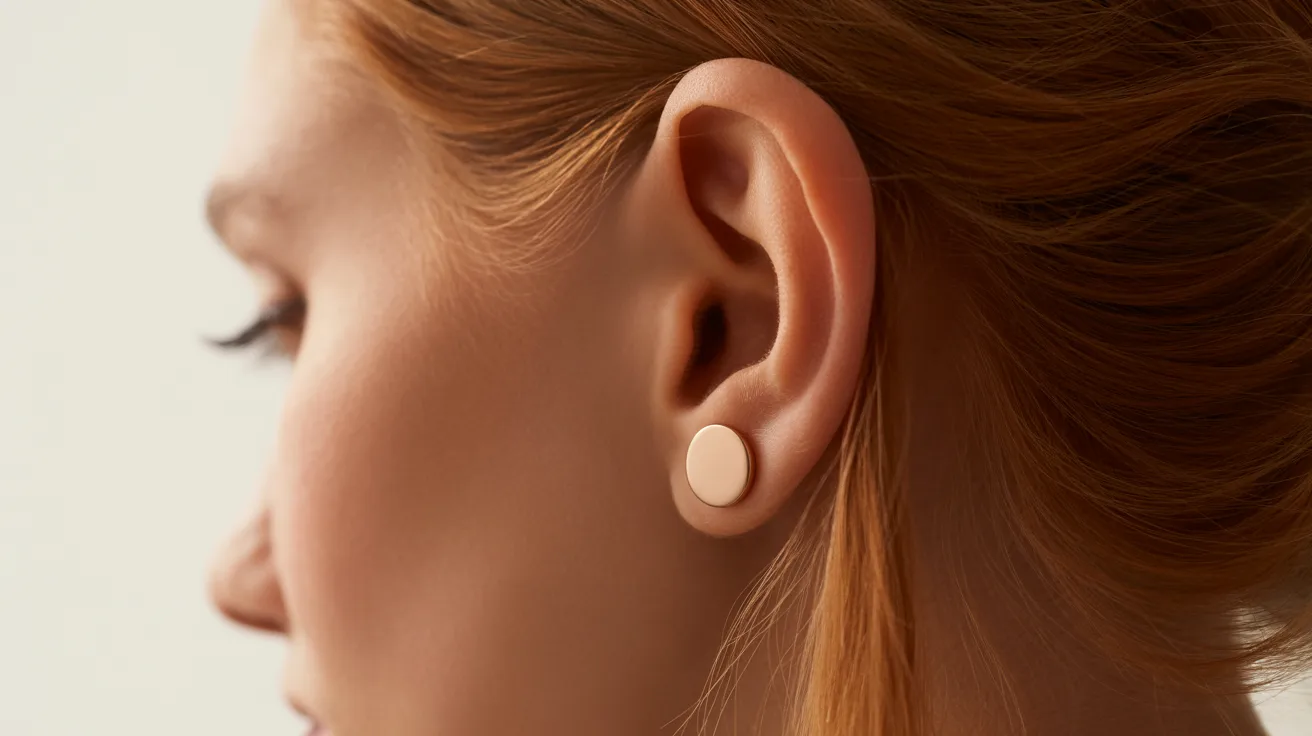
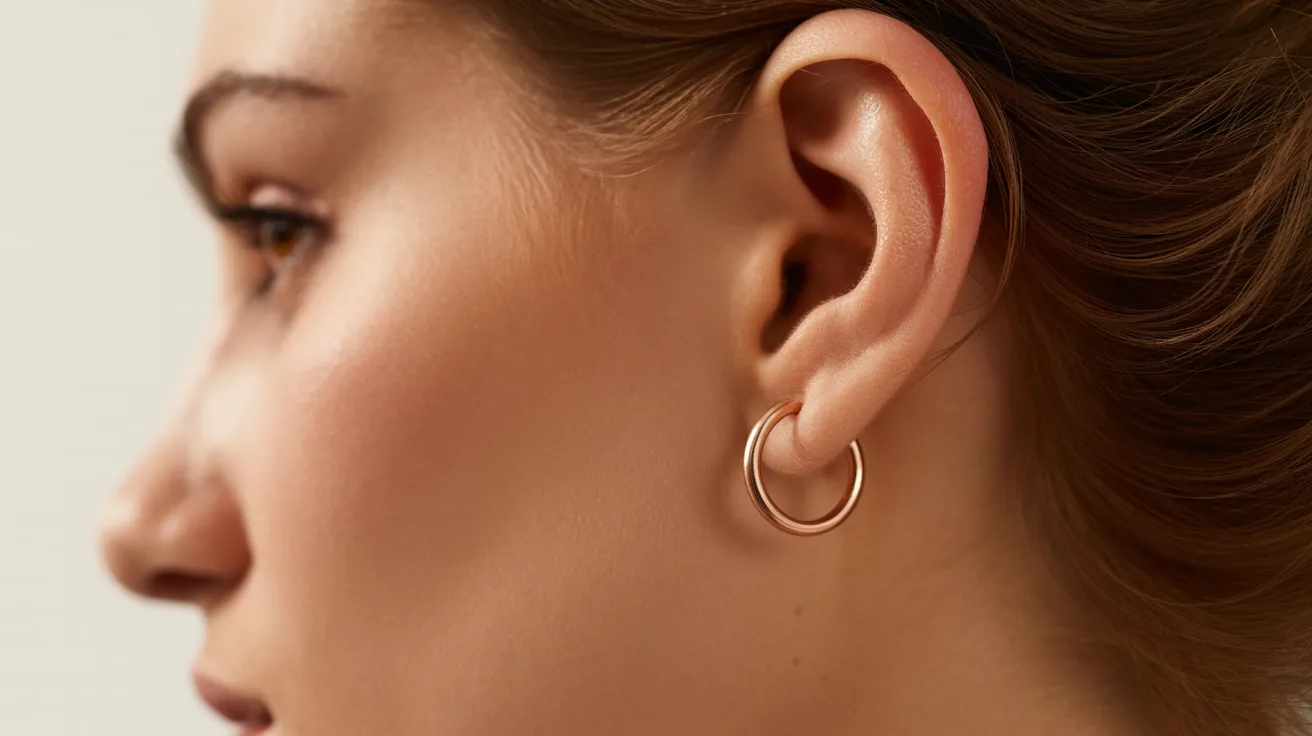
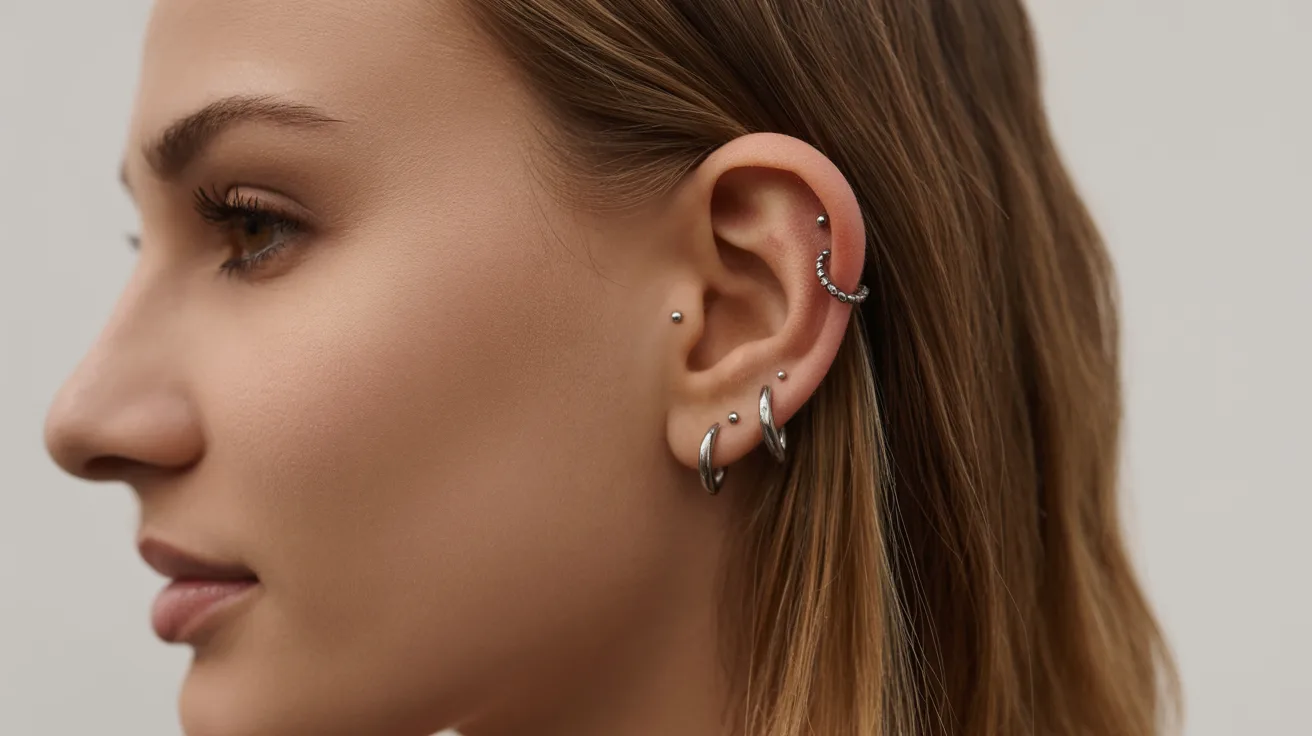
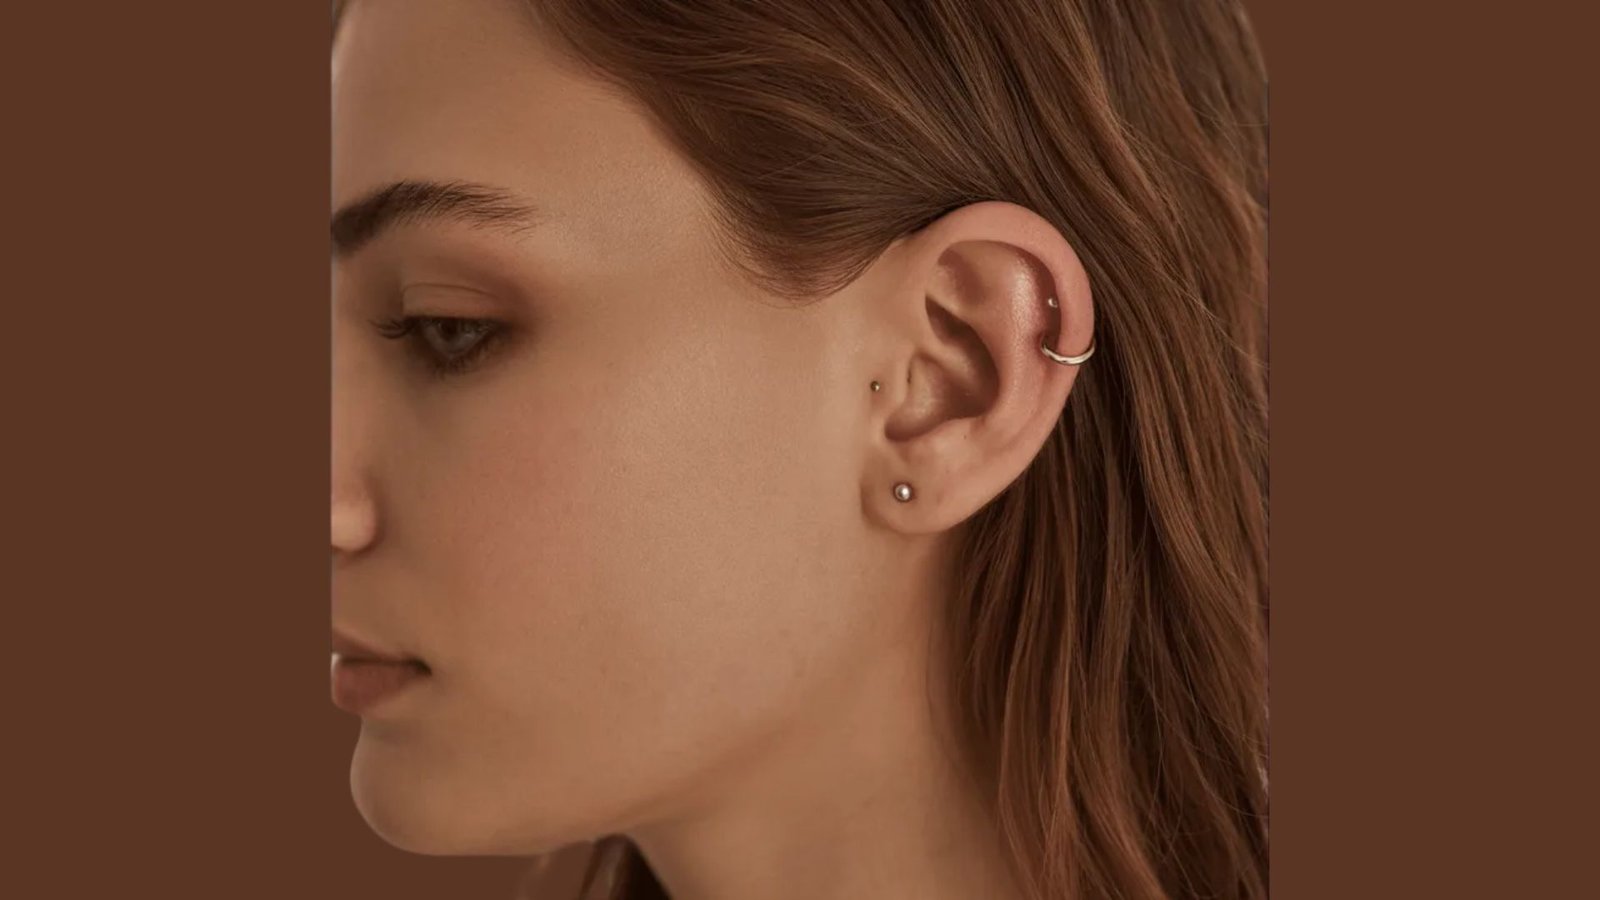
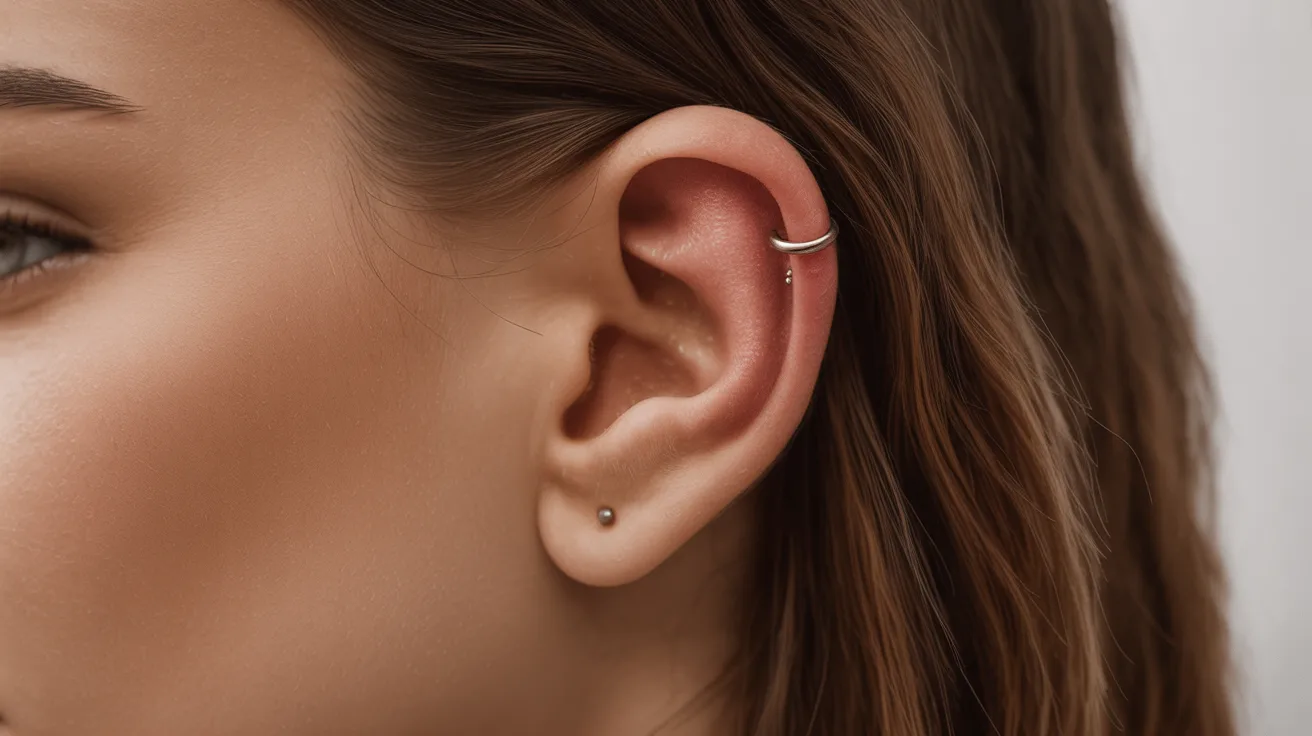
1. Standard Lobe
Placement: Soft lower ear lobe
The standard lobe piercing goes through the soft, fleshy tissue at the bottom of the ear.
It’s the most common starting point for anyone new to piercings. Healing is quick, usually 6 to 8 weeks. Studs, hoops, and dangles all work well here.
2. High Lobe
Placement: Above standard lobe
The high lobe sits just above the standard lobe, still in soft tissue. It heals at roughly the same pace.
This spot is popular for stacking alongside a lower lobe piercing. Small flat-back studs are a go-to choice for this placement.
3. Stacked Lobe
Placement: Multiple vertical lobe piercings
Stacked lobe piercings are a set of two or more piercings placed vertically along the lobe. Most people build this look over time, adding one as the last one fully heals.
Mixing jewelry sizes makes the stack look intentional and well-put-together.
4. Transverse Lobe
Placement: Through lobe side-to-side
The transverse lobe piercing passes horizontally through the earlobe, from one side to the other. It uses a curved barbell instead of a standard stud.
This one takes longer to heal and has a higher chance of migration, so aftercare matters a lot.
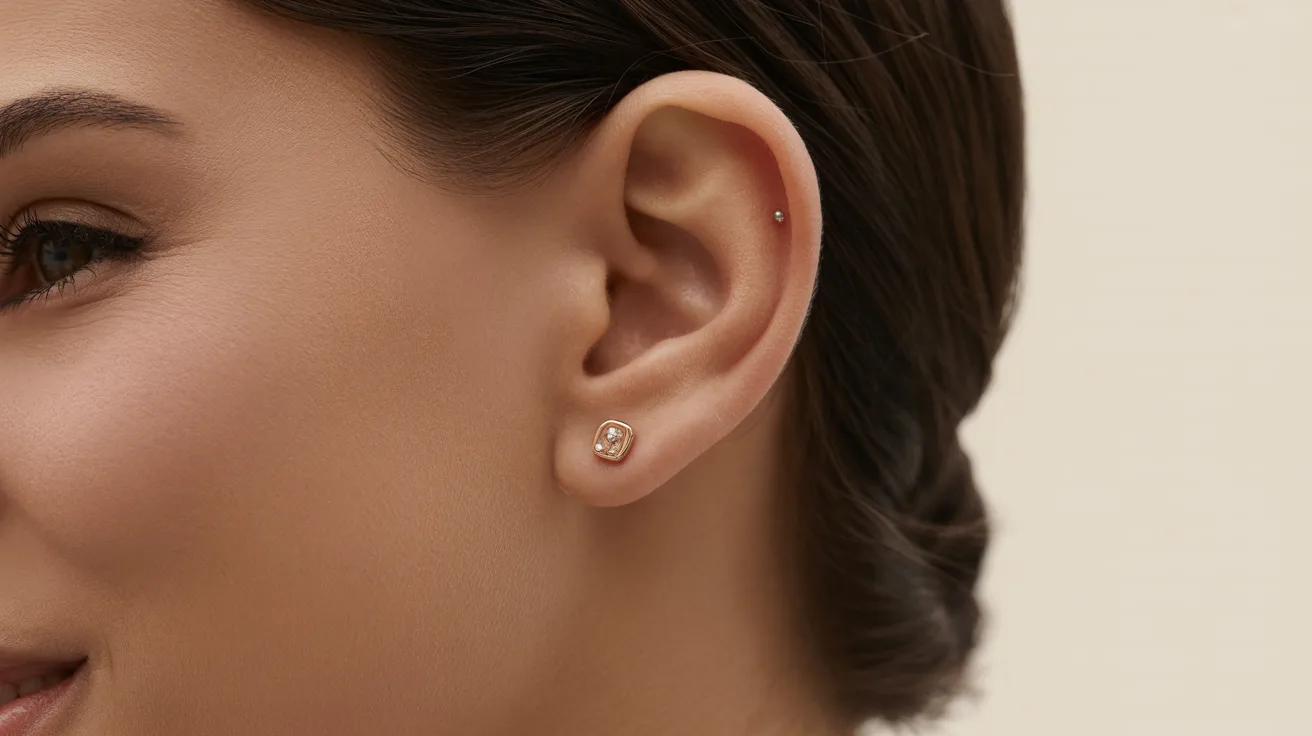
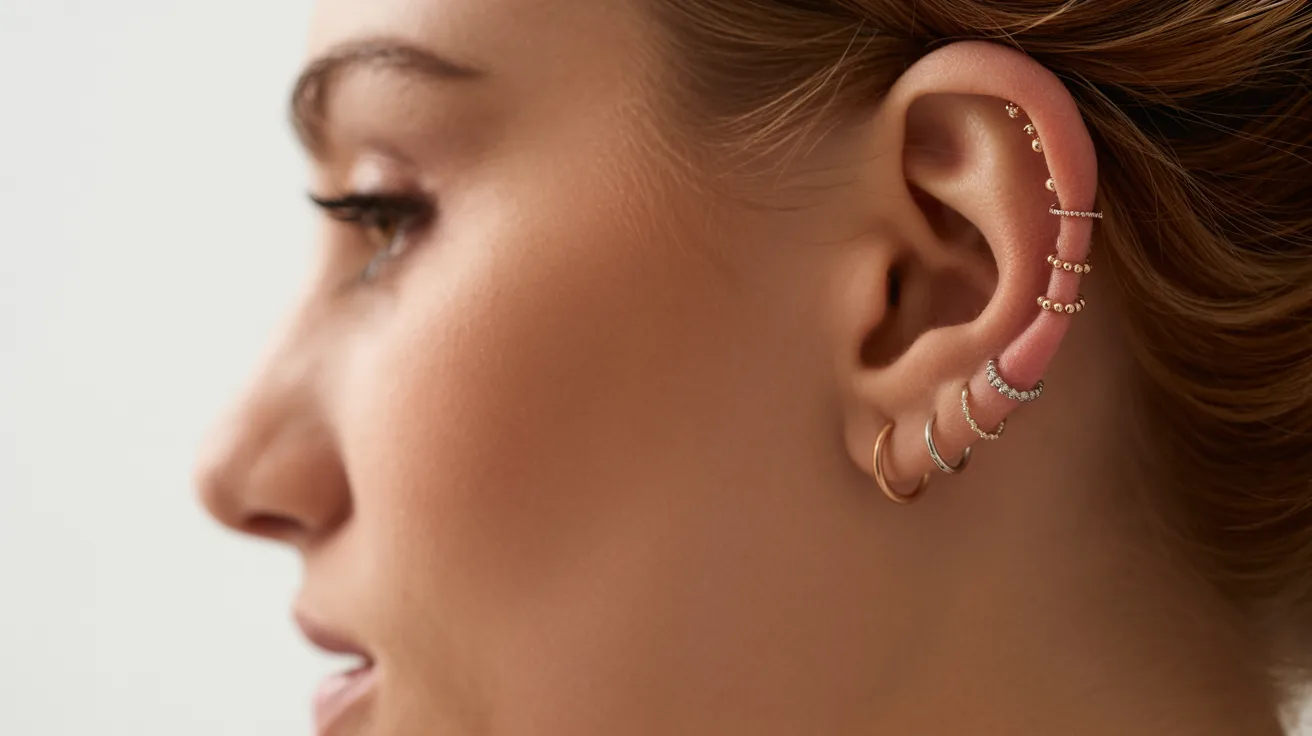
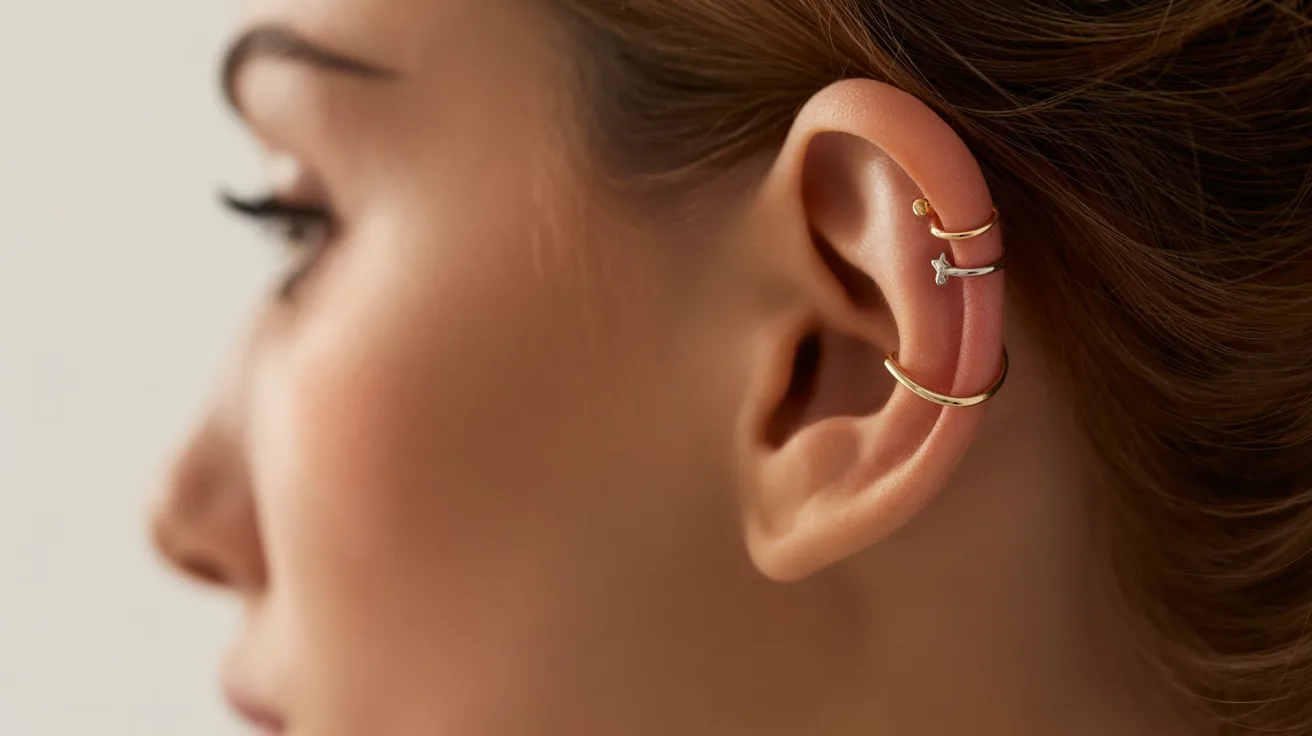
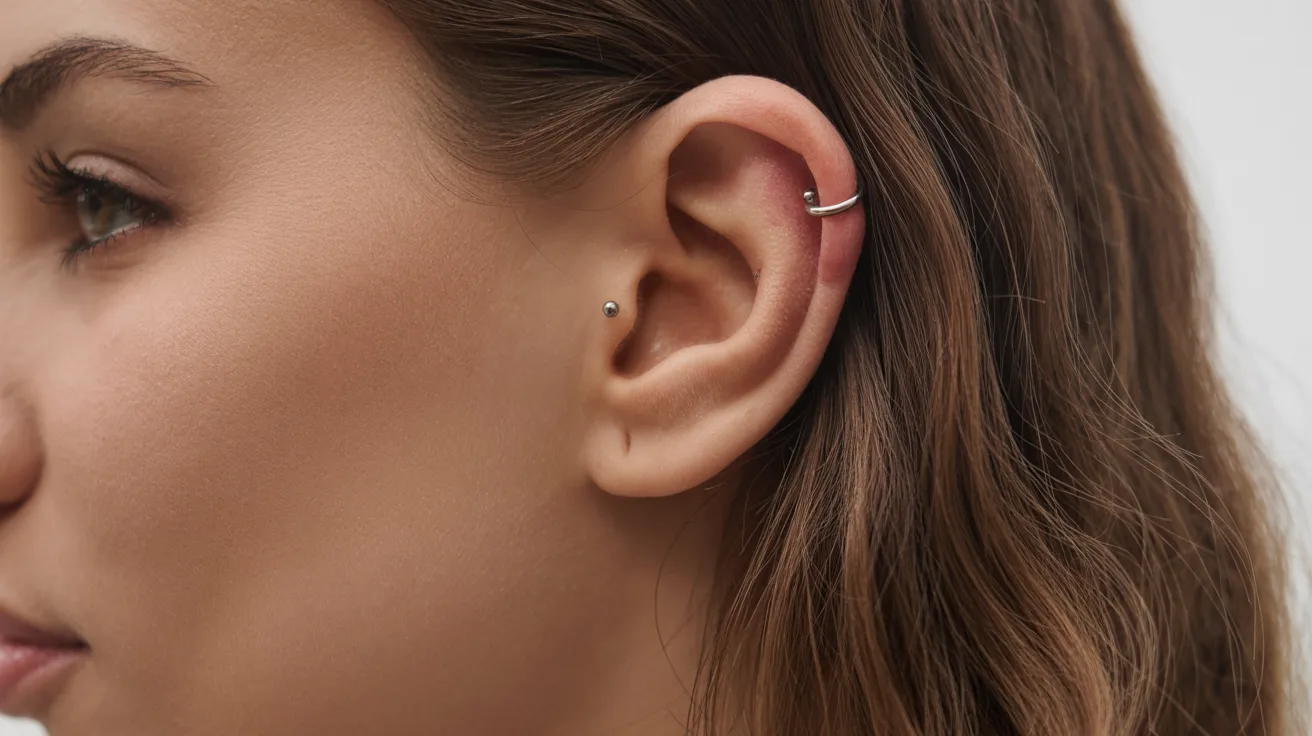
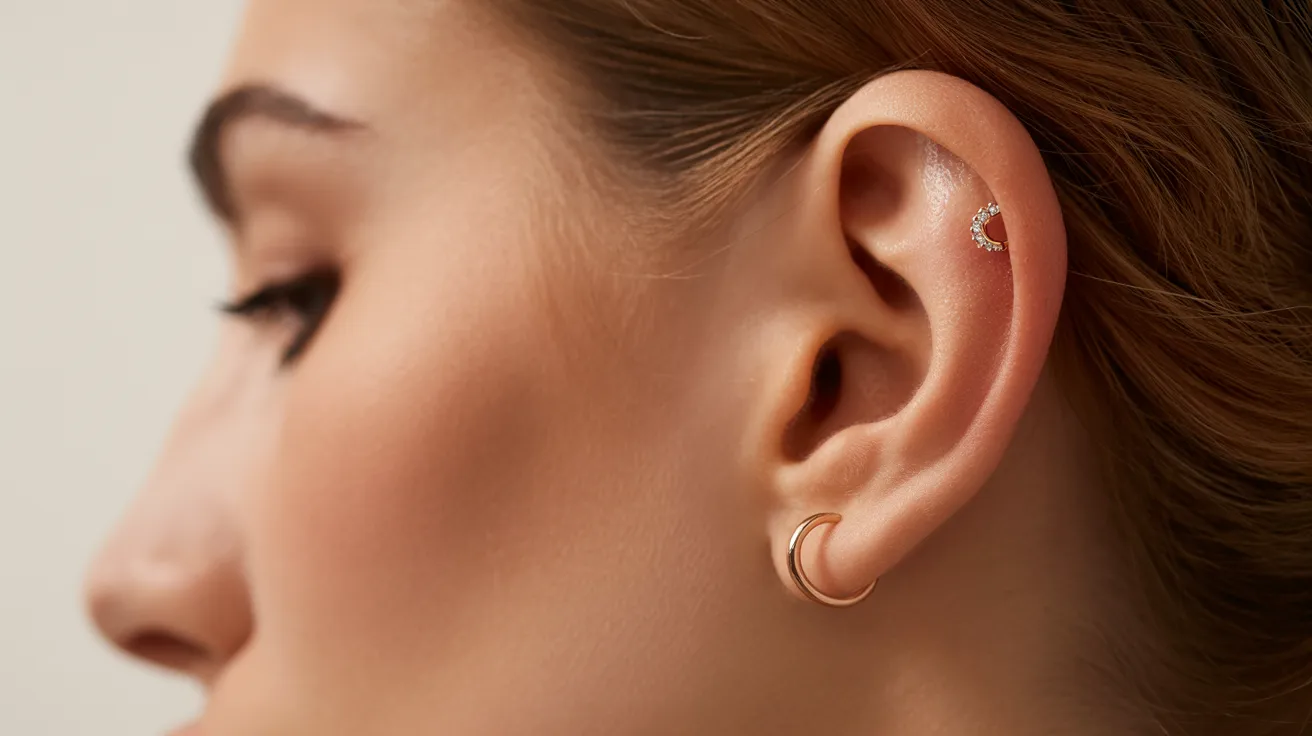
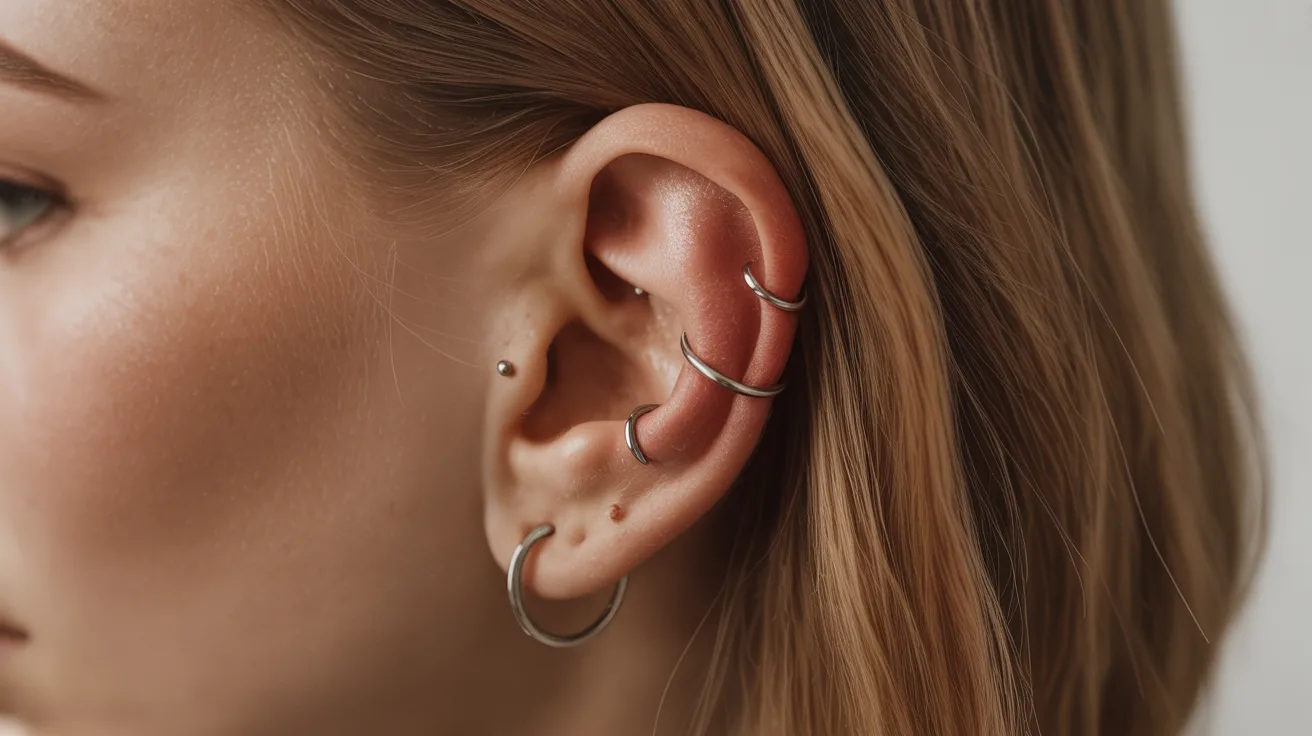
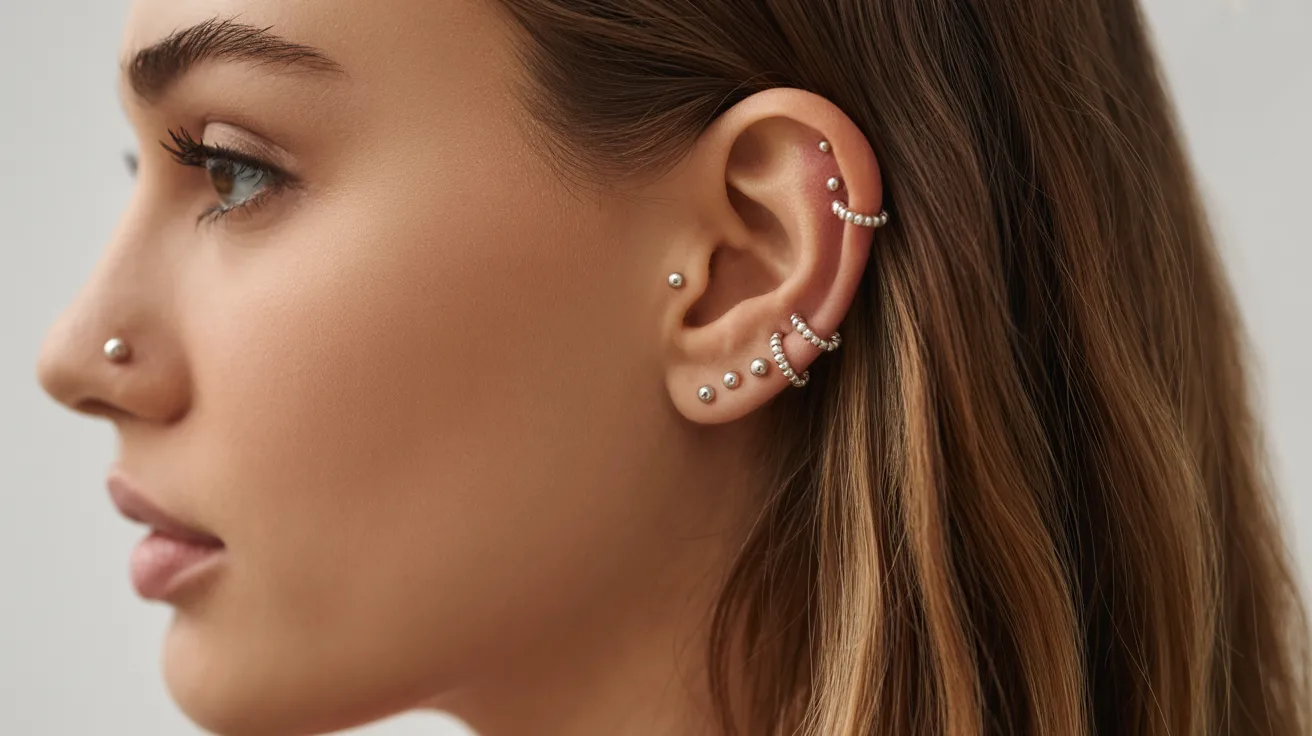
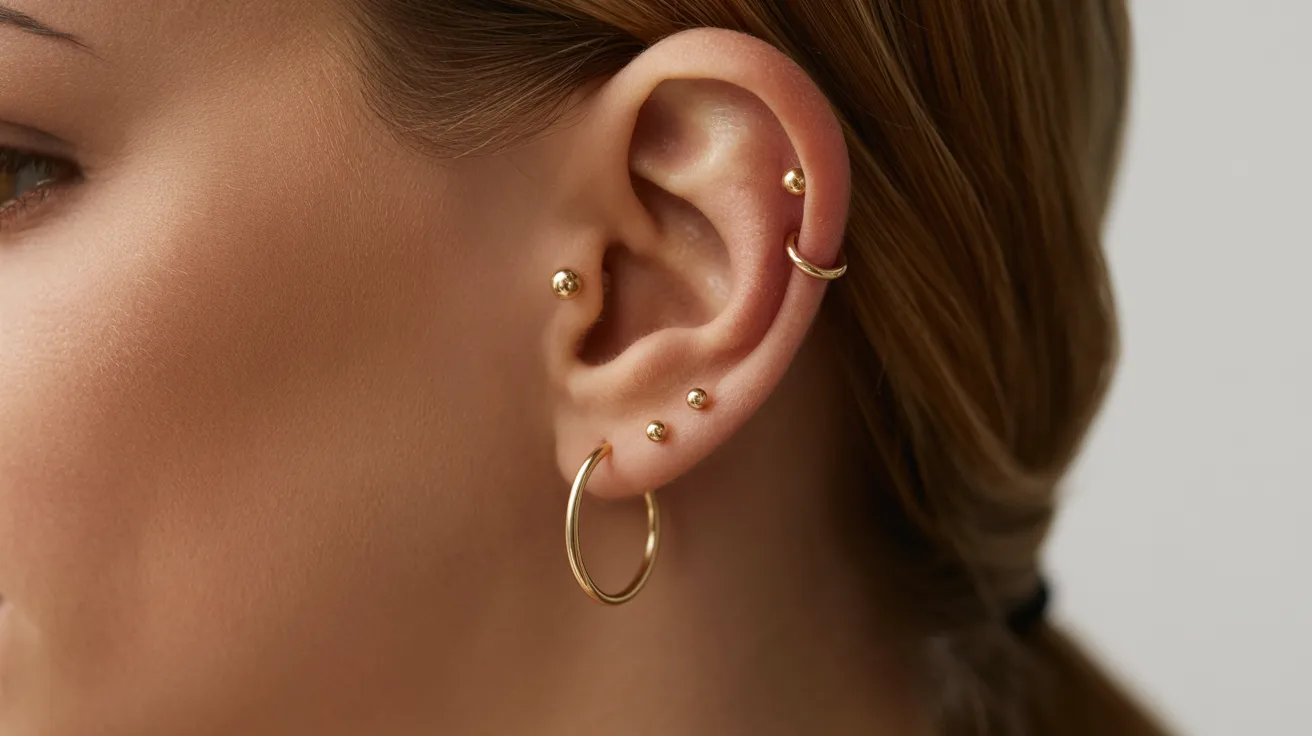
5. Helix
Placement: Upper outer cartilage
The helix runs along the upper outer rim of the ear. It’s one of the most requested cartilage piercings.
Flat studs and small hoops both sit nicely here. Plan for a healing window of 6 to 12 months, since cartilage takes longer than soft tissue.
6. Forward Helix
Placement: Front upper cartilage near tragus
The forward helix sits on the front edge of the upper cartilage, close to the face and tragus. Flat-back studs are the best fit here.
Some people get two or three stacked forward helix piercings for a layered look along that front edge.
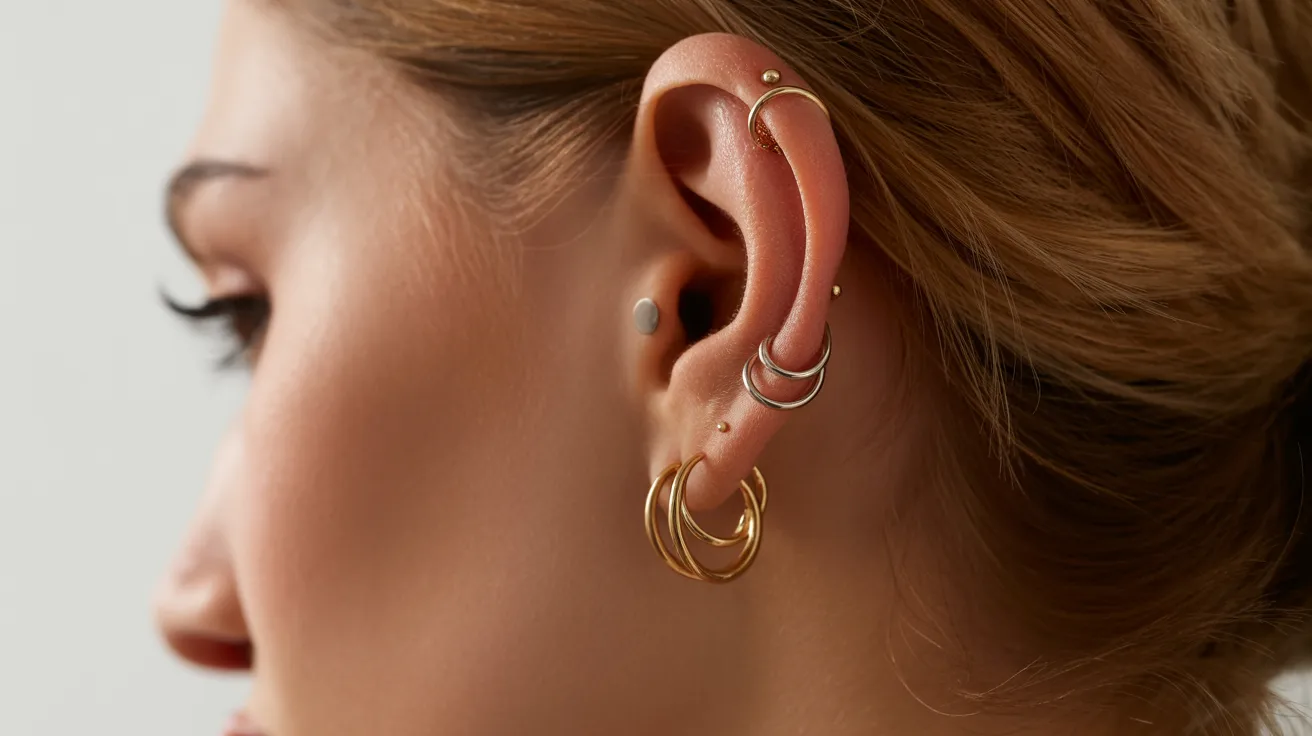
7. Tragus
Placement: Small flap over ear canal
The tragus is the small, thick flap of cartilage that partially covers the ear canal. A small stud or hoop sits here.
It takes longer to heal because of the cartilage density. Daily cleaning is key to keeping this spot free from irritation.
8. Anti-Tragus
Placement: Opposite tragus, above earlobe
The anti-tragus sits on the small raised ridge directly above the earlobe, across from the tragus. Not every ear has enough cartilage for this placement.
It’s less common but makes a strong statement. Curved barbells and small hoops work best here.
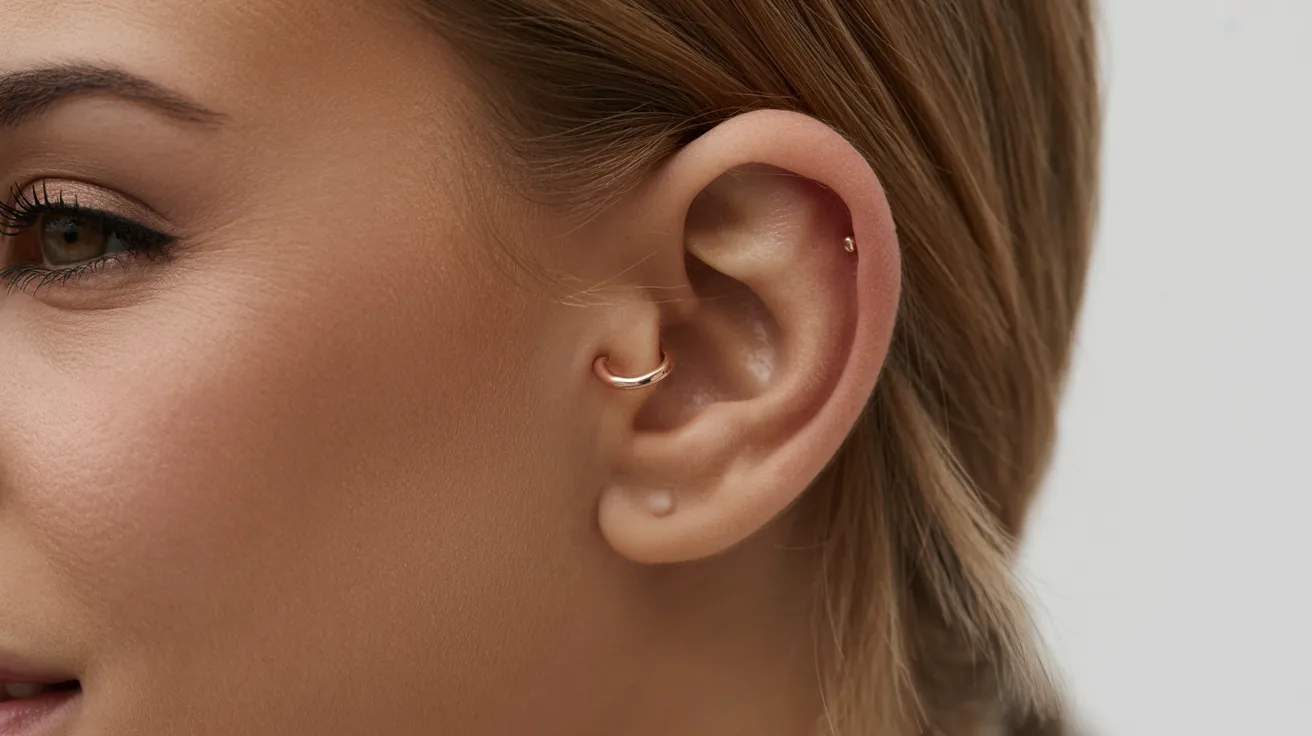
9. Conch
Placement: Middle ear cartilage
The conch sits in the center cartilage area of the ear. It comes in two forms: inner and outer. Both are popular.
You can wear a flat stud for a clean look or a large hoop that wraps around the outer rim of the ear.
10. Inner Conch
Placement: Inner ear cartilage near canal
The inner conch is placed in the cup-shaped center of the ear, close to the canal. A flat stud works best in this spot.
The cartilage is thick, so full healing takes time. Once healed, it looks sharp and minimal on any ear.
11. Outer Conch
Placement: Outer rim of middle ear cartilage
The outer conch sits on the flat area of cartilage along the outer middle section of the ear. A large hoop worn here creates a dramatic wrap-around effect.
This spot suits bold jewelry well. Expect healing to take anywhere from 6 to 12 months.
12. Rook
Placement: Inner cartilage fold above daith
The rook goes through the thick inner fold of cartilage that sits above the daith. It’s one of the denser spots on the ear, so it tends to be more painful.
A curved barbell is standard jewelry for this placement. Healing can take up to a year.
13. Faux Rook
Placement: Top of rook area, avoids deep fold
The faux rook mimics the look of a rook but passes through the surface skin near the top, skipping the deep cartilage fold.
It’s a better option for ears without a well-defined rook ridge. Healing is generally easier and faster than a true rook.
14. Auricle / Mid-Helix
Placement: Outer ear, halfway between lobe and helix
The auricle, also called the mid-helix, sits on the outer rim of the ear at the midpoint between the lobe and upper helix.
Hoops and studs both work well here. Many people pair it with a helix piercing to build a layered outer ear look.
15. Snakebite
Placement: Two side-by-side mid-to-high helix
Snakebite ear piercings are two closely placed piercings on the mid-to-high helix, sitting side by side.
Matching jewelry on both makes the pair look intentional. The double placement creates a graphic, sharp look along the upper ear that stands out clearly.
16. Hidden Helix
Placement: Inside top fold of ear
The hidden helix sits tucked inside the top fold of the ear. You won’t see it straight on from the front.
It’s one of the most subtle ear piercings you can get. A great pick for anyone who wants something low-key that only shows at certain angles.
17. Snug / Anti-Helix
Placement: Inner rim above anti-tragus
The snug, also known as the anti-helix, passes through the inner cartilage ridge just above the anti-tragus.
The tissue here is dense, making this one of the more painful ear placements. Curved barbells are the standard choice and sit comfortably along the inner rim.
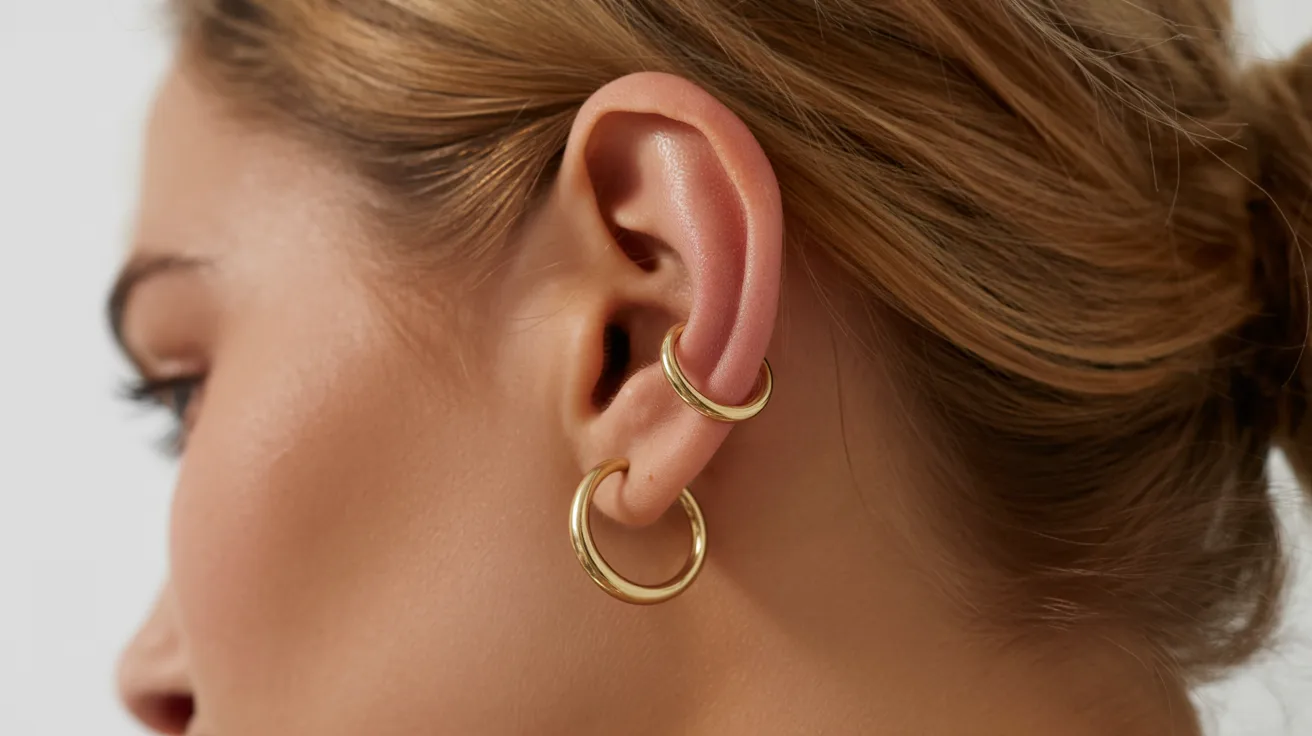
18. Orbital
Placement: Ring connecting two piercings
An orbital uses a single ring looped through two separate piercings. It can be placed on the lobe, helix, or conch.
The ring size and spacing between the two holes determine the final look. It’s a connected style that feels different from most single piercings.
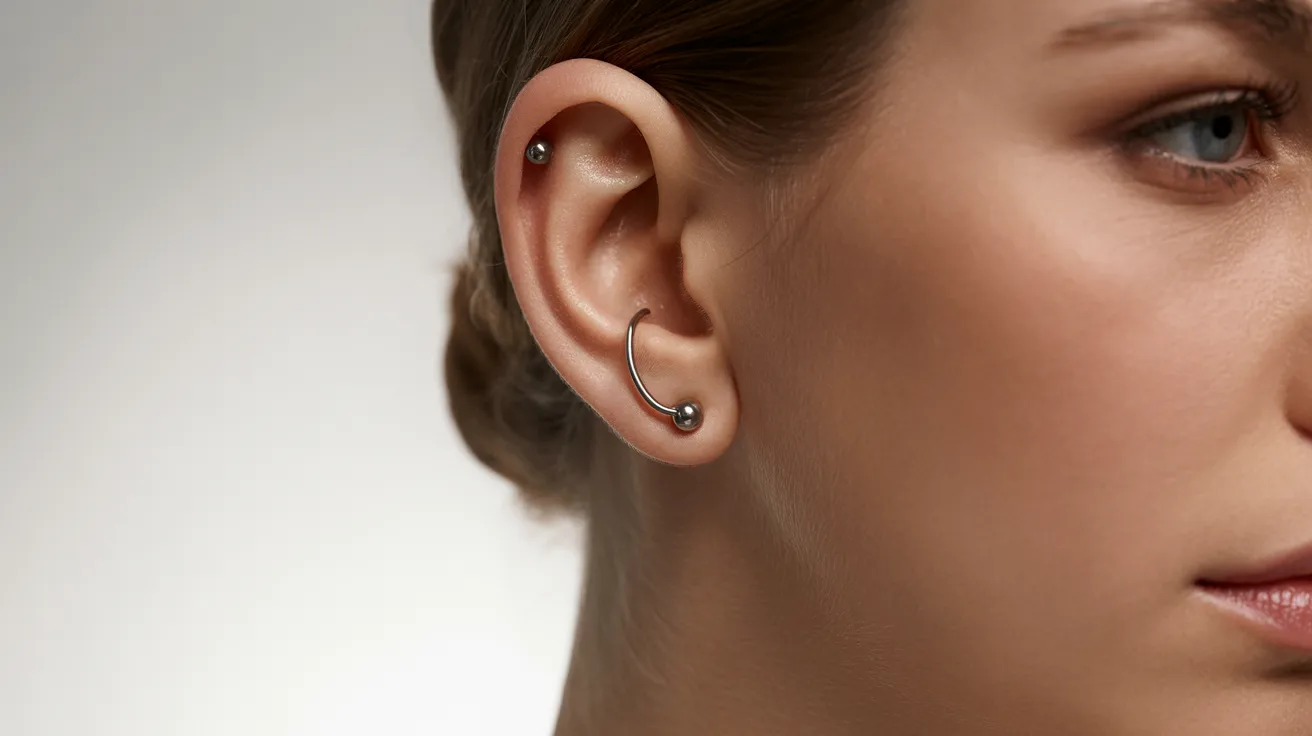
19. Daith

Placement: Hoop inside cartilage near canal
The daith sits in the small curved fold of cartilage just above the ear canal opening. A hoop is the standard jewelry choice here.
It pairs well with a tragus or conch piercing. Some people choose it hoping for migraine relief, though results vary by person.
20. Industrial
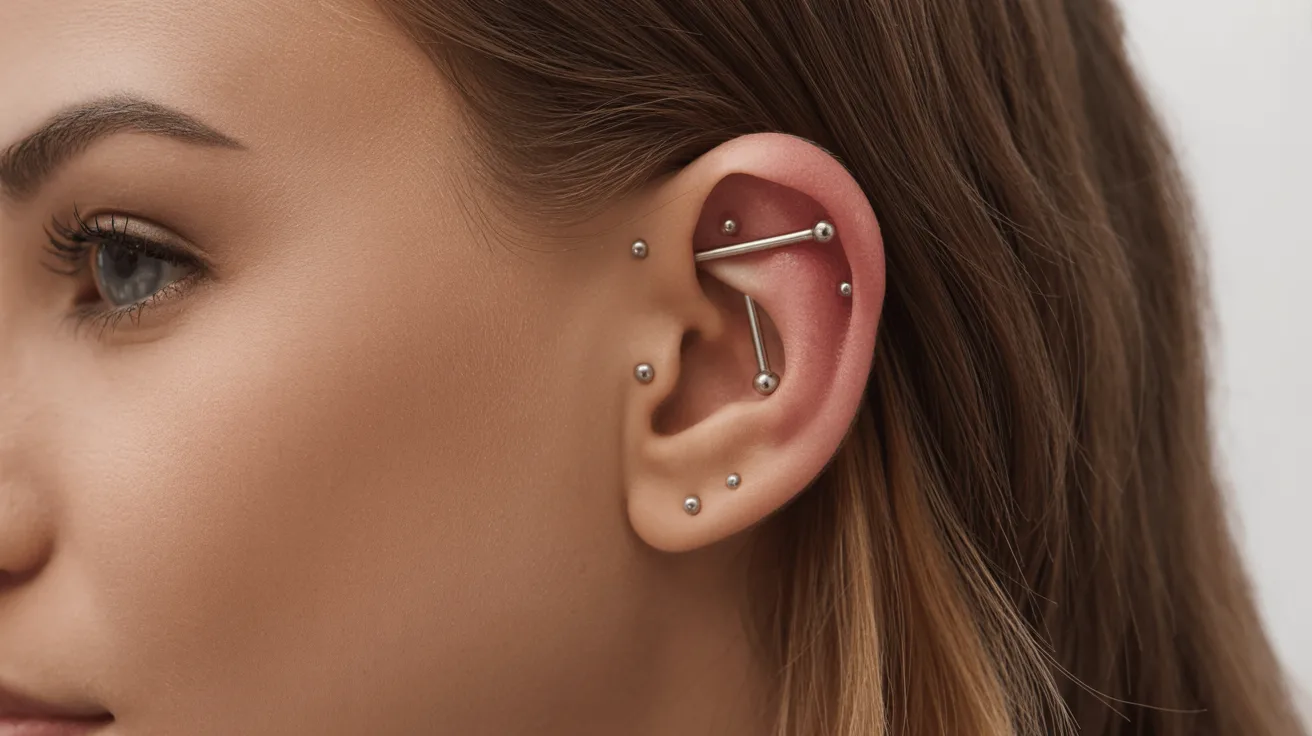
Placement: Two upper cartilage piercings connected by bar
The industrial uses one straight barbell to connect two separate upper cartilage piercings. One hole sits at the forward helix, the other at the upper helix.
The bar crosses the top of the ear. Healing takes up to a year and requires careful, consistent care.
21. Tragus Ladder / Multiple Tragus
Placement: Sequential piercings along tragus flap
A tragus ladder lines up multiple piercings along the tragus flap, one after another. Most ears can support two to three.
Each piercing needs its own healing period before adding the next. The stacked result on such a small surface area is bold and eye-catching.
22. Helix Cluster / Multi-Helix
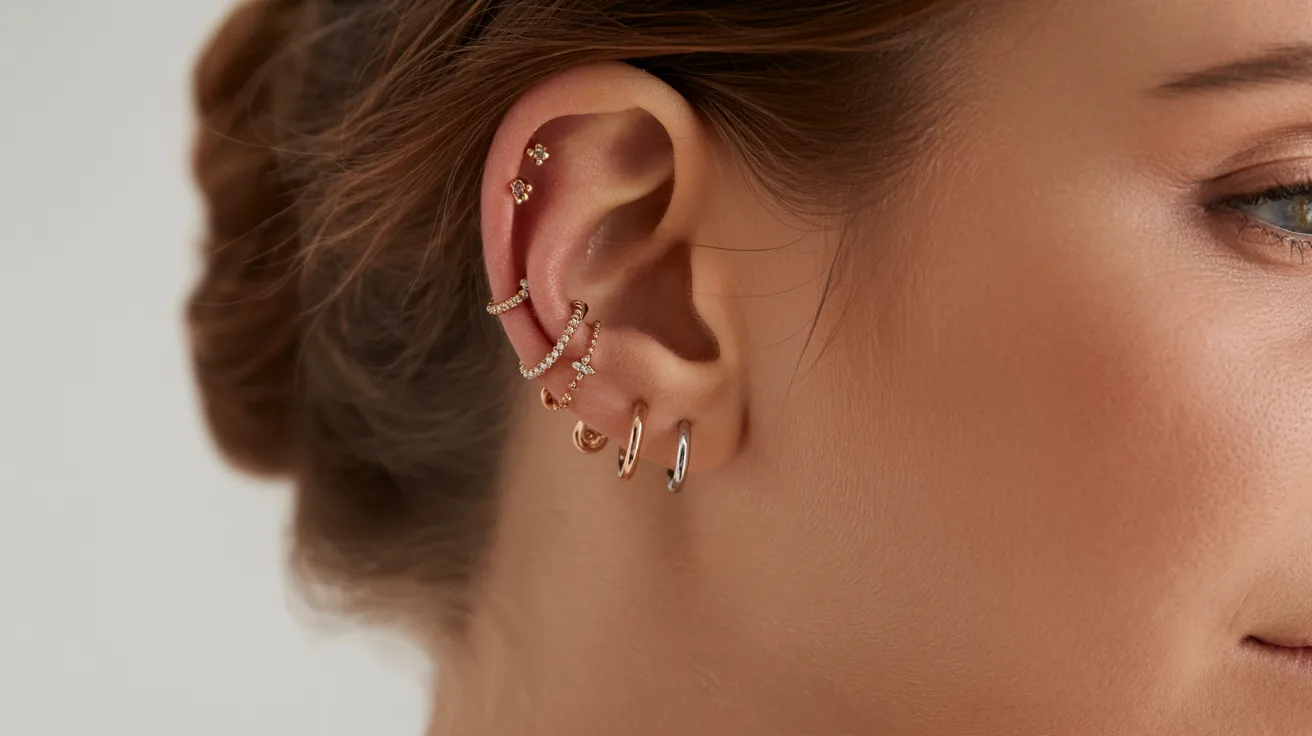
Placement: Multiple stacked helix piercings
A helix cluster groups several piercings together along the upper helix. Mixing small studs and hoops of different sizes adds depth to the look.
Most people build this slowly, one piercing at a time, waiting for each to fully heal before adding the next one.
23. Conch & Helix Combo
Placement: Combination of conch and helix
The conch and helix combo pairs one or more helix piercings with a conch on the same ear. Together they fill the middle and upper sections of the ear in a balanced way.
It’s one of the most popular approaches to building a full, layered ear look.
Ear Piercing Care Tips
Good habits from day one make healing much easier than trying to fix issues later.
- Clean Regularly: Use a sterile saline spray twice a day to keep bacteria away from the piercing site.
- Hands Off: Only touch your piercing when cleaning it, and always wash your hands first.
- Sleep Smart: Use a travel pillow with a hole in the center or sleep on the opposite side to avoid pressure on the piercing.
- Choose the Right Jewelry: Start with implant-grade titanium or surgical steel to lower the risk of irritation or allergic reactions.
- Be Patient: Most cartilage piercings take 6 to 12 months to fully heal, so resist swapping jewelry too soon.
Stick to these five habits every day, and your piercing will heal cleanly without setbacks.
Conclusion
I wish I’d had this when I got my first cartilage piercing. I guessed. You don’t have to.
Now you know all the types of ear piercings, exact placements, and what each one looks like. You’re ready to choose with confidence.
Start small or go bold. Just care for it well.
Which one are you getting next? Drop it in the comments. And if this helped, share it with a friend who’s still deciding.
Frequently Asked Questions
What is the easiest ear piercing to heal?
The standard lobe heals the fastest because it passes through soft tissue, not cartilage.
How long does a cartilage piercing take to fully heal?
Most cartilage piercings take 6 to 12 months to fully heal with proper daily aftercare.
Can I get two ear piercings done at the same time?
Yes, but I’d recommend no more than two or three at once so your body can heal without being overwhelmed.
What jewelry is safest for a new piercing?
Implant-grade titanium is the safest starting material because it’s hypoallergenic and less likely to cause irritation.
There is no confirmed medical evidence to support this claim, though some people say they notice personal relief.